Thursday, 29 May 2014

Sew What?


Damn kids are expensive, especially when they grow faster than Great Dane puppies.

My son really needed winter pajamas and I thought to myself, "Myself, it can't be that hard to make them".  I haven't sewn since high school but was sure that it must be like riding a bike, Right? 

So off I go to the local habby and fabric shop. I had already found the patterns online, so no lengthy paging through huge pattern books. Got the fabric, all the bits n bobs and a seamstress was born, well kinda.

I had borrowed my Mom's sewing machine and over locker and was set to go. Copied out the pattern on to pattern paper, remembering to copy all the notches and markings (Mrs Watt would be so proud), cut out my fabric and was ready to go. I then spent the next few hours trying to figure out how to thread the over locker and get the tension right without needles shattering all over the place. My perseverance paid off and I began putting the pieces together.

I won't lie, I was impressed with myself. They were not without fault but they fitted and my son loved his new snuggly pajamas. He said he would not mind if I knitted him some more, LOL. That is just priceless

Tuesday, 27 May 2014

Bling it on

If I were a bird, I would have been a Magpy. Bring on the bling!

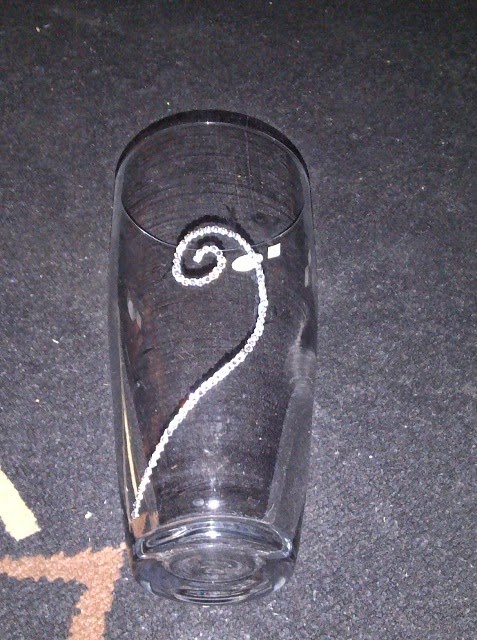
In an attempt to make some extra cash, I made up a few vases encrusted with diamante.

Initially I spent a fortune on different types of glue as I wanted the bling to stay on the glass even if it needed to be washed. Well finally the only glue that seemed to work was epoxy. The one where you need to mix the two tubes together to make the yukky sticky stuff.

First I would draw the design on the vase with a thin whiteboard marker. Then using a toothpick, I would add a small line of glue and immediately (also using toothpick) add the diamante.


The process is slow but rewarding.


Below a few others I made. These make stunning gifts.

James Dean - Nelson Mandela - Marilyn Monroe
Gecko

Angel Wings


Olivia's Room

Ok, so I am new to this blogging world and have no idea how to change the blogs name from "My Kitchen Reno" but anyway, moving on...

Anyone out there who wanted to use a beautiful wall sticker would know that it is not a cheap exercise. So I decided to do a little DIY "wall painting".

Firstly I painted her room with what was supposed to be duck egg blue.


Then I searched for a silhouette of a tree on the sticker sites that I loved and drew the tree on the wall in pencil. I then took white wall paint and basically coloured it in.


I then found a small pack of wall stickers with cute characters and used them to liven up the tree.


 This was a fairly easy project and I'm sure that pretty much anyone who can hold a paint brush could do it...

Happy painting :)

Monday, 26 May 2014

Cupboard transformation

So finally after years of wanting and eventually needing a bigger home. My hubby and I discovered a deceased estate home for sale. We put in a cheeky offer and with in a few months we moved in (10 days after our daughter was born) 

This place was a mess! I could see the bigger picture and the huge potential but alas there was much work to be done. 

Will post about the many things we did to turn this dump into a wonderful home. 

But lets start with the kitchen...

These were the pictures we took when we first had a look at the house.


Left
Right
 Trouble was that we were a little short on the green stuff to have the kitchen remodeled by a pro and there was no way that I could live with it as it was. The cupboards were full of old grease and grime... eeeuw. 

So some serious internet searches and the purchase of a sanding machine, was the beginning of my big adventure...

I looked around and found some stunning handles at a fraction of the price at SDT in Jet Park. Bought some Gripseal - Indonesian Teak stain, a few brushes and convinced my husband I knew exactly what I was doing.

So Friday night we got the kids to bed, got out the screw driver and removed all the kitchen doors and all the hardware. Saturday we sanded down everything and started to do the stain. Sunday we painted the walls and re hung the doors...

Hell it was some serious hard labour but worth every second.


And just for fun, we added in a chalk board wall which has been a hit
Chalk Board Paint

So the next mission is to change the counter tops and the flooring....